How to Declutter Craft Supplies – For Real This Time…
I want to start by making it known that I am NOT A CRAFTER. I do not claim to be crafty, and it's actually pretty comical when I try (for real – my parents have a Christmas ornament to prove it. It's always front and center on the tree). However, I am good at decluttering and organizing, no matter the items. I've always wondered if my lack of interest in crafting has something to do with the number of THINGS that you need to craft.
There are so many different types of materials, items, and tools that it's no surprise most craft rooms are an overflowing black hole of craft supplies. Is every single piece of material necessary? Is every jewel or bead or Cricut vinyl REALLY necessary to keep? If it is – then why are you buying new supplies?
Before we look at how to declutter craft supplies, let's dive into some questions I have about craft supplies, shall we?
WHY Are There So Many Supplies?
I am absolutely amazed when a friend or family member shows me their craft room. It's almost always complete chaos. Do crafters have to keep a certain number of potentially necessary items to maybe recreate a craft idea down the road? I get the need for supplies, like ones that can be reused multiple times. I'm talking about glue, scissors, markers, etc.
However, when you do a specific project for a specific person and a specific event, why do you keep the leftover supplies? Ideally, you should see if you can return anything unused, and if you can't, ask yourself logically if you will use them again. If the answer is no – get rid of it!
Why Are They Stored So Chaotically?
I want to think that if I were a crafter, my supplies would be organized so that I could always find what I need when I need it. However, this doesn't appear to be the case with most crafty people. Usually, I see craft storage solutions overflowing with excess supplies. There are items on top of, below, and all around the designated storage area. And, typically, you end up buying duplicates because you can't find what you need!
You know what the crafter does when this happens? They buy another storage unit! And another! This does not solve the clutter of craft supplies; it merely masks the problem for a bit longer. This is the problem with crafting supply storage, which we will solve today.

How to Declutter Your Craft Supplies
Now that I've let my opinions flow concerning craft supplies let's walk through what you need to do to get them back in shape!
Make a Plan
Prior to starting your decluttering craft room journey, let's make a plan for how and where you want your crafts to be stored. Evaluate the storage solutions you already have. Decide if the craft supplies will remain where they are or if you will move them to a different area of the house.
If you move them, you will need to declutter the new area before starting on your craft supplies. One good thing about moving your storage location is that if the new space is smaller than the current area, you will be forced to get rid of more supplies than you likely would if the area stays the same size.
Also, note the storage solutions you want to keep when planning out your craft area. If there is a functional item that works well for your crafting needs, but others are bulky and inefficient, try to minimize the number of storage options you have. This will help push you to declutter more and allow you to clean up and maximize the space.
Block Out Time
Do not try to declutter your craft room “when you get time.” Instead, it would be best if you blocked out a set time that you will go through your supplies. The process of decluttering is much easier and faster when you take the initial steps to dedicate time to the project. So – put it on your calendar, write it in a notebook, set up an alarm – but block out time specifically to declutter your craft supplies.
Start Decluttering
That's right – just start! Many people get hung up on “where should I start” when that doesn't even matter. If you are decluttering your craft supplies, you will declutter them all, so the starting point doesn't matter. However, when you start the process, keep the following in mind:
Take Everything Out
When starting to declutter, I like to pick a corner and go through everything in that area. This means that you need to take everything out! Every box, every bin, and every storage container needs to be completely emptied and gone through. Don't assume you know what is in a container.
Cutting corners in this area will not benefit you. You may look at a box and say, “well, I know that's paint,” and decide not to go through it. However, what if some of those are almost empty? Or dried out? Or what if that missing jewel you've been looking for is nestled at the bottom of the box? When decluttering, you not only remove unnecessary items, but you also go on a treasure hunt!
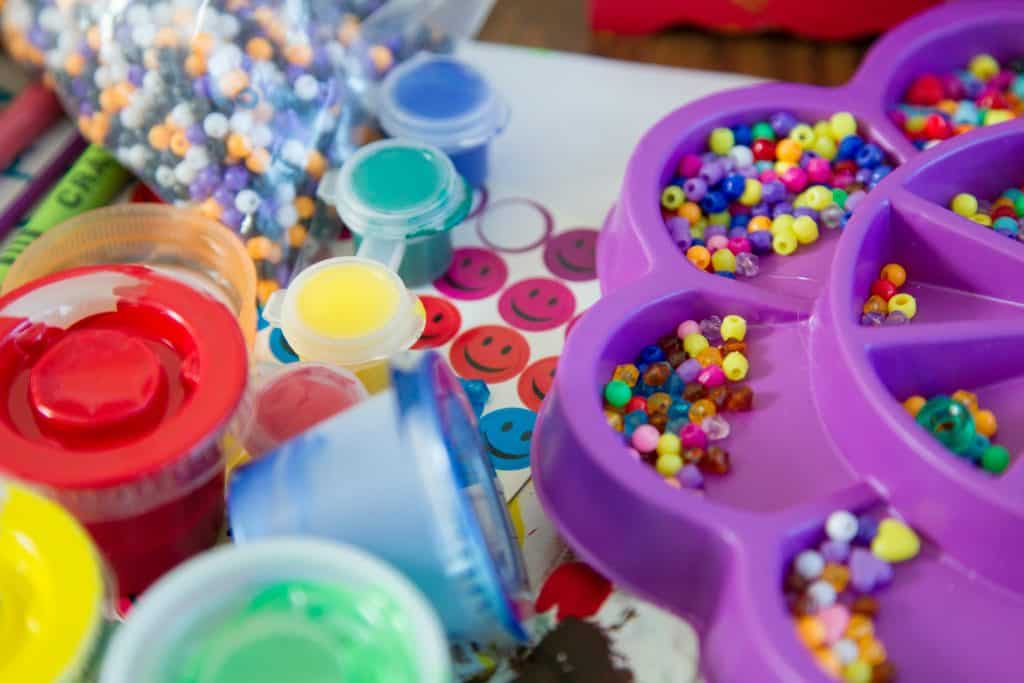
Sort Like Items Together
As you pull supplies out of their containers, sort them by type. Have a trash bag (or five) ready for all items you deem no longer necessary for your crafting journey. For the other things, start making piles. I would put all the pens, pencils, markers, paintbrushes, etc., in a pile. Paper items in another. Then tools and such are in yet another pile. (Yeah, I know – I don't craft or even really know the lingo.)
Now, when you finish that corner, I do not advise that you put the piles back. Not yet, anyway. Rather, continue working your way around the room and add to the piles as needed. I'm sure you will find other items that match your current piles. However, if you do have a container, and you've emptied it and know the keepers belong there, you can put those back.
Toss the Excess (or Return)
Fun fact – I love throwing things out. I get a huge sense of satisfaction when I can part with an item that I no longer deem necessary in my life. You should try it! For real. Go ahead and throw out anything that is no longer necessary. If you have two pieces left over from a project you completed years ago – it's ok to let them go.
I get saving items for a rainy day. However, I have also noticed that some supplies (actually, a lot of them) are super specific to one project. So if you aren't making the item regularly, go ahead and take it from Frozen and “LET IT GO!” Focus on broken things, torn, dried out, out of style, whatever the case may be. If you will not use it in the next week or so, and it isn't a universal project supply, get rid of it. You'll love the feeling of tossing the clutter!
Put Your Keepers Back Neatly
When you've completed your craft area's decluttering and sorting process, it's time to put the items you deemed as keepers back neatly where they will be stored. Refer to your initial plan. Do the items you kept fit into your planned storage solution? Do you need to tweak some things? Furthermore, I advise consolidating into your favorite storage solution first. Why? Because if you start putting things back where you got them, you aren't eliminating any excess storage solutions you have.
Yes. I've seen it. You have a craft bin you bought when you first started storing craft supplies. That one got full, so you bought another one. You've started lining them up around the room's perimeter, always thinking that the next storage solution will give you the organization you want. That's not working.
Take my advice – start with one storage item and fully stock it. Then move on to the next logical storage solution. You don't want to cram things together so they are not organized; you want to find what space will best hold each pile you've created. All of the like items, whether art and craft supplies or jewelry making, should be stored in one place. When done, if your decluttering was a success, you should have some storage items you can repurpose for another area of your home, sell, or trash them.
Organization of Craft Supplies
I can not stress enough that decluttering and organizing are two separate projects. The first step is to declutter, just as I've outlined it in this post. The second step is to organize the supplies in the most functional way possible. You do not want to buy more craft and hobby storage solutions until your craft supplies are clutter-free.
This means that the items you no longer store in your craft room but decide to keep also need to be neatly stored somewhere. Once all of that is done, and everything has a place and a purpose, then you can check out my article with craft supply organization ideas! (Coming Soon!)
Final Thoughts
When it comes to craft supplies, I am in no way an expert, far from it. However, I know how to declutter. While some of my comments are intended to be humorous and entertaining, they hold a lot of truth. If you've made it this far in the article, then I know that you WANT to declutter. So, do it! Follow these steps, bite the bullet, and feel the relief that comes when you know how to declutter craft supplies! It is possible to get rid of craft clutter!
You can check out my decluttering course if you want a little help and guidance to declutter more areas of your home. The Declutter Boot Camp will walk you through all of those commonly cluttered areas of your home. You've got this!